Deploy a smart contract with SmartPy
This tutorial covers writing and deploying a simple smart contract with the SmartPy programming language. SmartPy has syntax similar to Python, but you don't need any experience with Python or SmartPy to do this tutorial.
- If you are more familiar with OCaml, try Deploy a smart contract with CameLIGO.
- If you are more familiar with JavaScript, try Deploy a smart contract with jsLIGO.
- To learn the Archetype language, try Deploy a smart contract with Archetype.
SmartPy is a high-level programming language that you can use to write smart contracts for the Tezos blockchain.
It abstracts away the complexity of using Michelson (the smart contract language directly available on-chain) and provides different syntaxes that make it easier to write smart contracts on Tezos.
In this tutorial, you will learn how to:
- Create a wallet
- Get tokens from a faucet
- Code a contract in SmartPy, including:
- Creating a contract in the online IDE
- Defining the storage for the contract
- Defining entrypoints in the contract
- Writing code to run when the entrypoints are called
- Deploy (or originate) the contract to Tezos and set its starting storage value
- Look up the current state of the contract
- Call the contract
What is a smart contract?
A smart contract is a computer program that is stored on a blockchain and runs on a blockchain. Because the blockchain is spread across many computer nodes, you don't have to think about where to host the program or worry whether a computer will run it or not. Responsibility for running the contract is distributed across all of the nodes in the Tezos system, so when you deploy a smart contract, you can be confident that it will be available and unmodified when someone wants to run it.
A smart contract has these parts:
- It has persistent storage, data that the contract can read and write
- It has one or more entrypoints, which are a kind of function that clients can call, like endpoints in an API or functions or methods in many programming languages
- It has a Tezos account and can store tez (technically, the contract is itself a type of Tezos account, but you can think of it as a program with a Tezos account)
Tutorial contract
The contract that you deploy in this tutorial stores a string value. It provides entrypoints that clients can call to change the value of that string:
- The
replaceendpoint accepts a new string as a parameter and stores that string, replacing the existing string. - The
appendendpoint accepts a new string as a parameter and appends it to the existing string.
After you deploy the contract, you or any other user can call it from various sources, including web applications, other contracts, and the Octez command-line client.
Creating and funding a wallet
To deploy and work with the contract, you need a wallet and some tez tokens.
-
Install a Tezos-compatible wallet. Which wallet you install is up to you and whether you want to install a wallet on your computer, in a browser extension, or as a mobile app.
If you don't know which one to choose, try the Temple browser extension, because then you can use it in the same browser that you are using to view the web app.
Desktop wallets for Tezos include the Temple browser extension, Kukai, and Umami.
-
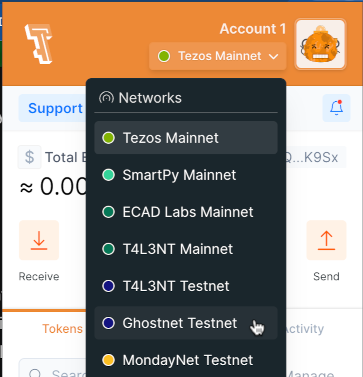
Switch the wallet to use the Ghostnet testnet instead of Tezos Mainnet. Ghostnet is a network for testing Tezos applications where tokens are free so you don't have to spend real currency to work with your applications.
For example, for the Temple browser wallet, click Tezos Mainnet at the top and then click Ghostnet Testnet, as in this picture:
-
From your wallet, get the address of your account, which starts with
tz1. This is the address that applications use to work with your wallet. -
Go to the Ghostnet faucet page at https://faucet.ghostnet.teztnets.xyz.
-
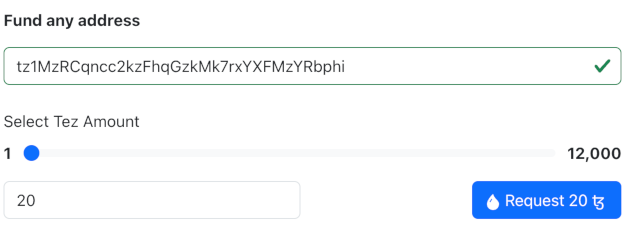
On the faucet page, paste your wallet address into the input field labeled "Or fund any address" and click the button for the amount of tez to add to your wallet. 20 tez is enough to work with the tutorial contract, and you can return to the faucet later if you need more tez.
It may take a few minutes for the faucet to send the tokens and for those tokens to appear in your wallet.
You can use the faucet as much as you need to get tokens on the testnet, but those tokens are worthless and cannot be used on Mainnet.
Now you have an account and funds that you can use to work with Tezos.
Creating the contract
The contract that you will create has these basic parts:
-
A function that initializes the contract and sets the starting value for it storage.
-
Internal functions called entrypoints that run code when clients call the contract.
-
Automated tests that verify that the contract works as expected.
Follow these steps to create the code for the contract:
-
Open the SmartPy online IDE at https://smartpy.io/ide. You can work with SmartPy code in any IDE, but this online IDE keeps you from having to install software on your computer, and it also simplifies the process of deploying contracts.
-
In the code editor, add this line of code to import SmartPy:
import smartpy as sp -
Add this code that creates the entrypoints:
@sp.module
def main():
    class StoreGreeting(sp.Contract):
        def __init__(self, greeting): # Note the indentation
            self.data.greeting = greeting

        @sp.entrypoint # Note the indentation
        def replace(self, params):
            self.data.greeting = params.text

        @sp.entrypoint # Note the indentation
        def append(self, params):
            self.data.greeting += params.text
Indentation is significant in Python, so make sure that your indentation matches this code.
The first two lines create a SmartPy module, which indicates that the code is SmartPy instead of ordinary Python.
Then the code creates a class named StoreGreeting, which represents the smart contract. The contract has an
__init__function, which runs when the contract is deployed. In this case, the function sets the initial value of the storage to a parameter that you pass when you deploy the contract. This storage value is a string, but the storage can be another primitive type such as an integer or timestamp, or a complex data type that contains multiple values. For more information on contract data types, see Data types. -
Add this code, which creates automated tests:
@sp.add_test(name = "StoreGreeting")
def test():
    scenario = sp.test_scenario(main)
    scenario.h1("StoreGreeting")

    contract = main.StoreGreeting("Hello")
    scenario += contract

    scenario.verify(contract.data.greeting == "Hello")

    contract.replace(text = "Hi")
    contract.append(text = ", there!")
    scenario.verify(contract.data.greeting == "Hi, there!")
These tests run automatically on compilation to verify that the replace and append endpoints work. For more information about SmartPy and tests, see the SmartPy documentation.
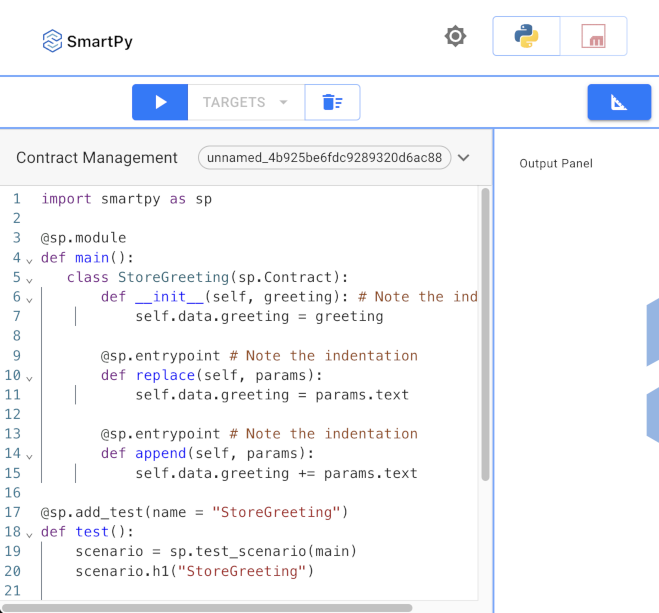
The SmartPy online IDE looks like this:
The complete contract looks like this:
import smartpy as sp

@sp.module
def main():
    class StoreGreeting(sp.Contract):
        def __init__(self, greeting): # Note the indentation
            self.data.greeting = greeting

        @sp.entrypoint # Note the indentation
        def replace(self, params):
            self.data.greeting = params.text

        @sp.entrypoint # Note the indentation
        def append(self, params):
            self.data.greeting += params.text

@sp.add_test(name = "StoreGreeting")
def test():
    scenario = sp.test_scenario(main)
    scenario.h1("StoreGreeting")

    contract = main.StoreGreeting("Hello")
    scenario += contract

    scenario.verify(contract.data.greeting == "Hello")

    contract.replace(text = "Hi")
    contract.append(text = ", there!")
    scenario.verify(contract.data.greeting == "Hi, there!")
Testing and compiling the contract
Before you can deploy the contract to Tezos, you must compile it to Michelson, the base language of Tezos contracts. The compilation process automatically runs the tests.
-
Compile the contract and run the tests by clicking the Run Code
button.
The right-hand pane of the online IDE shows the results of the automated tests. For example, the first test calls the
replaceentrypoint and passes the text "Hi", so after the call the contract storage is "Hi". Here is a picture of what this completed test looks like in the IDE: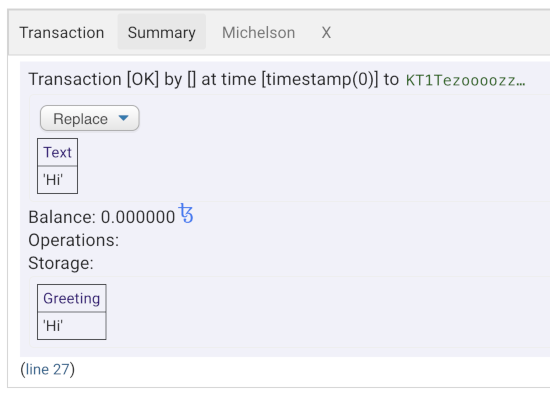
Deploying (originating) to the testnet
Deploying a contract to the network is called "originating." Originating the contract requires a small amount of Tezos tokens as a fee.
-
At the top of the page, click Editor to go back to the source code of the smart contract.
-
Compile the contract and run the tests by clicking the Run Code
button again.
-
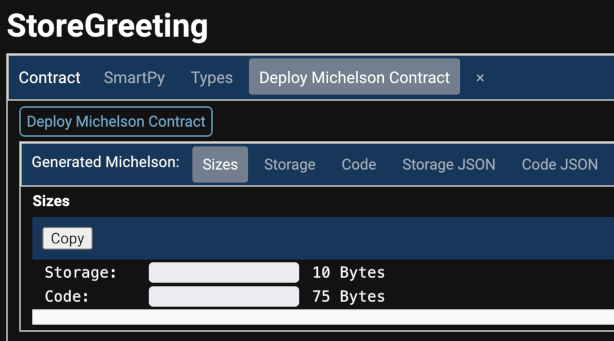
On the right side of the page, click Deploy Michelson Contract.
The IDE shows information about the compiled Michelson contract, including the amount of data required to store it and the code of the contract:
-
Above the information about the Michelson contract, click the Deploy Michelson Contract button. The "Originate from browser" window opens.
-
In the Node and Network list, select Ghostnet.
-
Click the Select account button. A popup window with a few different ways to connect a wallet opens.
-
In the popup window, if you are using the Temple wallet, click Temple, or if you are using any other kind of wallet, click Beacon.
-
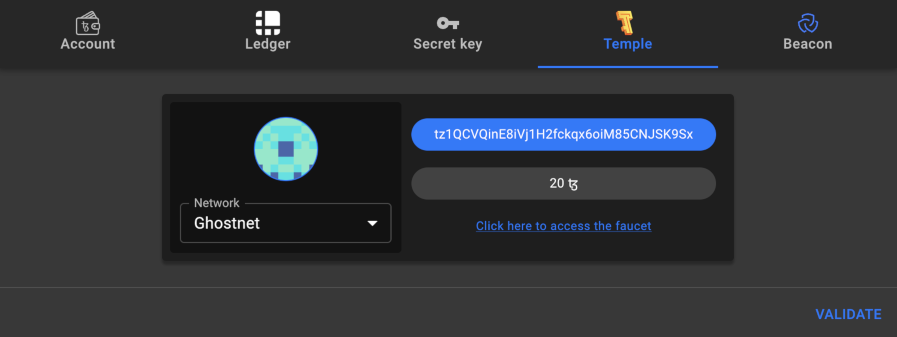
Follow the steps to connect your wallet. The popup window shows your account address and its balance in tez, as in this picture:
-
Click Validate.
-
Farther down the page, click Deploy contract.
-
In the popup window, click Accept.
-
Approve the transaction in your wallet.
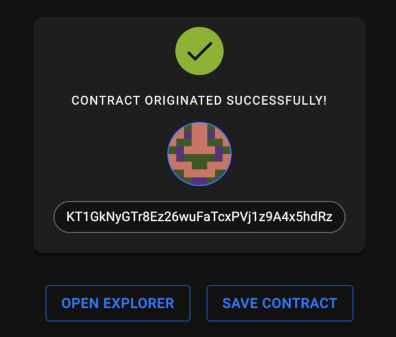
If the deployment process was successful, the IDE shows a success message with the address of the new contract:
-
Copy the address of the deployed contract, which starts with
KT1. It will not be shown again. -
Open the block explorer Better Call Dev at this link: https://better-call.dev/
-
Paste the address of the contract in the search field and press Enter.
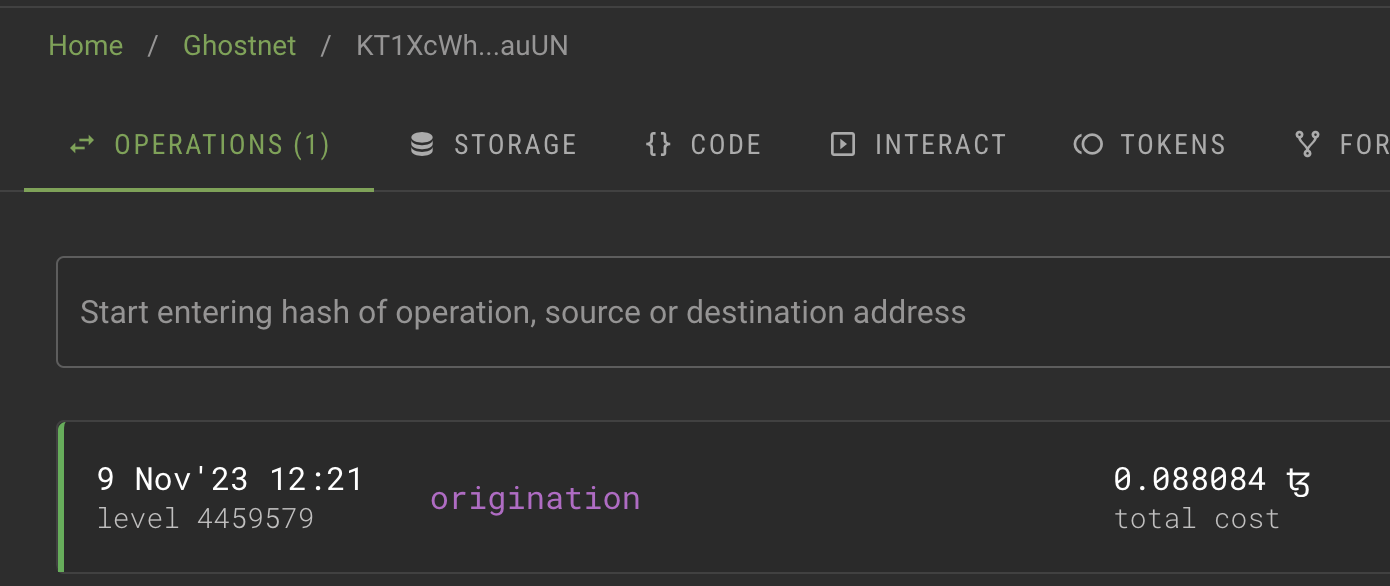
The block explorer shows information about the contract, including recent transactions and the current state of its storage.
-
Try calling one of the endpoints:
-
Go to the Storage tab and check the current state of the storage. If you just originated the contract, the storage is "Hello" because that's the value set in the smart contract code.
-
Go to the Interact tab. This tab shows the entrypoints in the contract and lets you use them.
-
For the
appendentrypoint, in the Parameters section, put some text in the field, as shown in this image: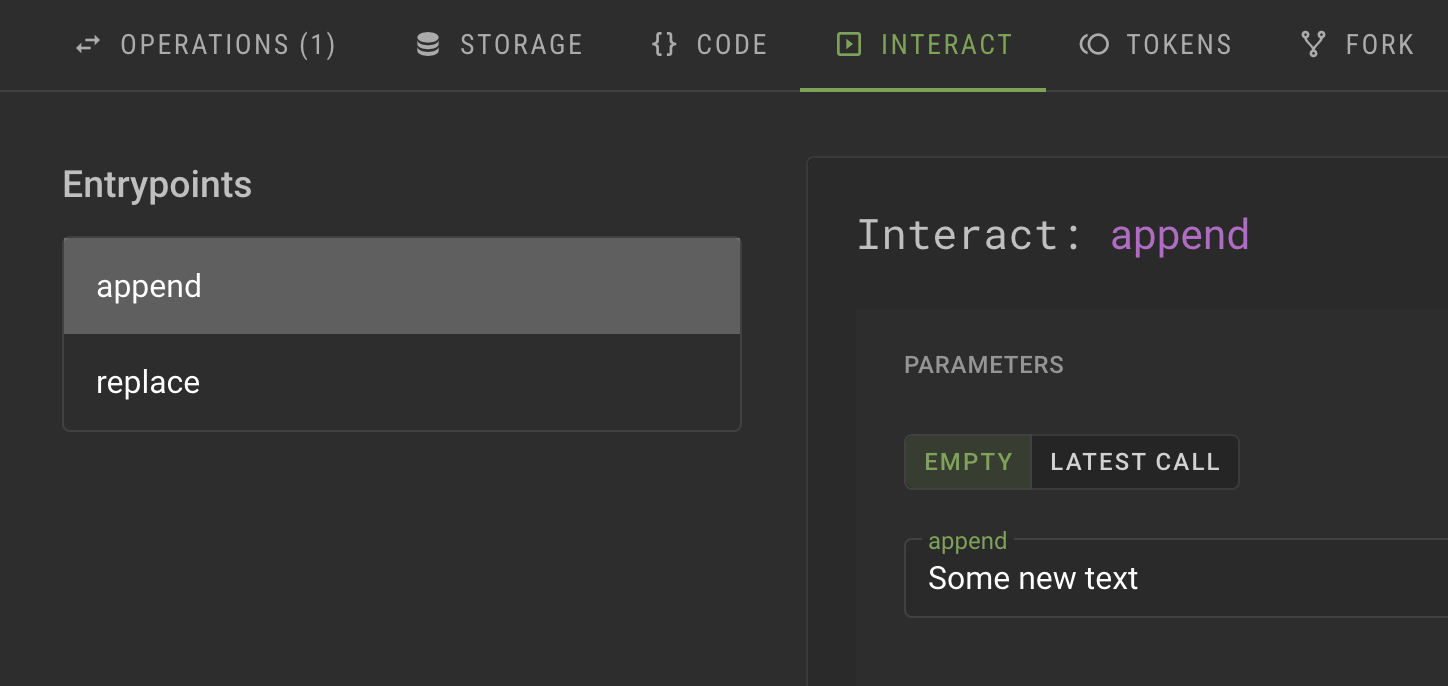
-
Click Execute and then click Wallet.
-
Select your wallet and connect it to the application.
-
Confirm the transaction in your wallet.
-
Wait for a success message that says "The transaction has successfully been broadcasted to the network."
-
Go back to the Storage tab and see that the text that you put in the parameter has been added to the contract storage, as in this picture:
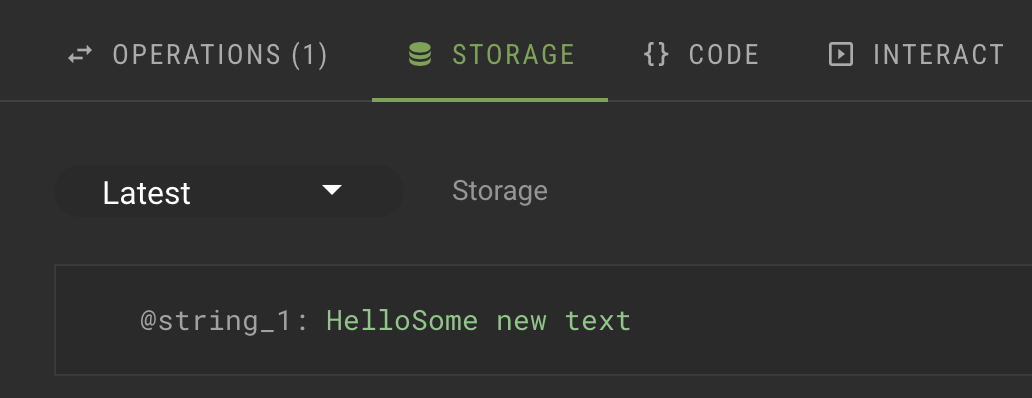
-
Summary
Now the contract is running on the Tezos blockchain. You or any other user can call it from any source that can send transactions to Tezos, including Octez, dApps, and other contracts.
If you want to continue working with this contract, try creating a dApp to call it from a web application, similar to the dApp that you create in the tutorial Build your first app on Tezos. You can also try adding your own endpoints and originating a new contract, but you cannot update the existing contract after it is deployed.